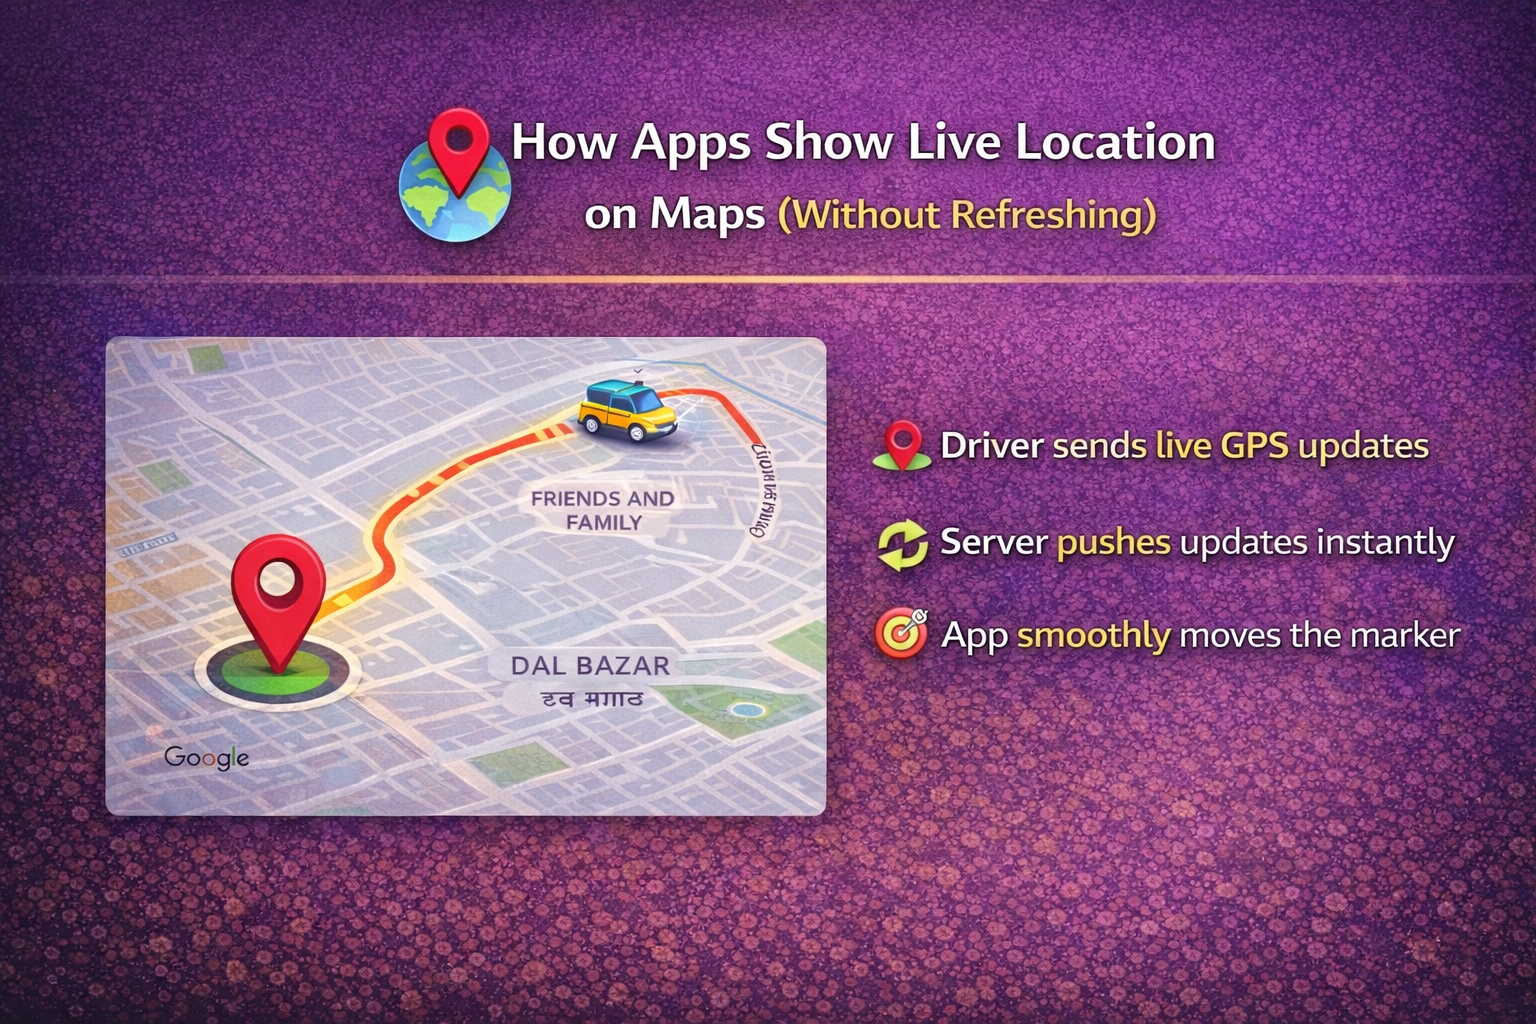
You’ve ordered food. You open the app. And there it is—a little car or bike icon moving smoothly across the map, getting closer to your home in real-time, showing live location updates.
No refresh button. No lag. Just live, continuous tracking.
Food delivery, ride-hailing, and logistics apps around the world have mastered this experience. It feels magical, but behind that smooth UI is a carefully designed real-time system built on solid engineering principles.
Let’s break down exactly how it works.
The Challenge: Real-Time Without the Overhead
Traditional web applications work on a request-response model. The user asks for data, the server responds, and that’s it. To get new data, you refresh the page or click a button.
But live tracking can’t work that way. You can’t ask users to refresh every few seconds to see if their driver has moved. And constantly polling the server for updates would drain batteries, waste bandwidth, and overwhelm backend systems.
The solution? Push-based, event-driven communication that sends updates only when something changes.
Step 1: The Driver App Sends Live GPS Data
Everything starts with the driver’s smartphone. Their app uses the device’s GPS to capture location coordinates—latitude and longitude—every few seconds.
Here’s what makes this efficient:
- Small payload size: Only coordinates and a timestamp are sent, not entire data objects
- Lightweight updates: The frequency is tuned (typically 3-10 seconds) to balance accuracy and battery life.
This keeps data usage low while maintaining smooth, real-time positioning.
Step 2: The Backend Uses Push-Based Communication
This is where the magic happens. Instead of the user’s app repeatedly asking “Has the driver moved yet?”, the backend pushes updates the moment new location data arrives.
Two technologies dominate this space:
WebSockets
WebSockets establish a persistent, two-way connection between client and server. Once connected, data flows freely in both directions without the overhead of repeated HTTP requests.
Think of it like a phone call that stays open. Either side can speak at any time without redialing.
Server-Sent Events (SSE)
SSE provides a one-way channel from server to client. It’s simpler than WebSockets when you only need server-to-client updates, which is often the case for location tracking.
Both approaches eliminate page refreshes and reduce network overhead dramatically compared to traditional polling.
Step 3: One Real-Time Channel per Order or Trip
Security and scalability matter. When you’re tracking your order, you shouldn’t see someone else’s driver or receive updates meant for another user.
The solution is channel isolation:
- Each order or trip gets a unique real-time channel (like a room or topic)
- Users subscribe only to their specific channel
- The backend routes location updates only to subscribers of that channel
This creates clean separation of traffic, prevents data leakage, and makes the system inherently more scalable—millions of isolated channels can operate simultaneously without interfering with each other.
Step 4: In-Memory Caching for Performance
Here’s a critical optimization: you can’t afford to query the database every time someone needs the current driver location.
At scale, with millions of active orders, database reads would become a bottleneck. The solution is in-memory caching, typically using systems like Redis:
- The latest driver location is stored in ultra-fast cache
- Cache reads take microseconds instead of milliseconds
- Database writes happen less frequently (perhaps once per minute for historical records)
- The cache can handle massive read loads during peak demand
This architecture ensures that when ten thousand users simultaneously check their delivery status, the system doesn’t break a sweat.
Step 5: Frontend Updates Only What’s Needed
On the user’s screen, the map itself is rendered once. When new location data arrives via WebSocket or SSE:
- The map stays unchanged: No full re-render
- Only the driver marker moves: A small DOM update
- Smooth animations: The marker animates between positions rather than teleporting
- Efficient rendering: Modern frameworks like React update only what changed
This approach is incredibly efficient. The browser isn’t redrawing the entire interface—just moving one small icon smoothly from point A to point B.
The Complete Flow in Action
Let’s trace one location update through the entire system:
- Driver’s GPS captures new coordinates (e.g., every 5 seconds)
- Driver app sends coordinates to backend via HTTPS POST
- Backend writes to cache (Redis) and pushes update to the trip’s channel
- All users subscribed to that trip’s WebSocket channel receive the update
- Frontend receives coordinates, animates marker to new position
- User sees smooth, continuous movement
Total time from GPS capture to screen update: typically under 500 milliseconds.
Why This Architecture Works at Scale
This system architecture isn’t just elegant—it’s battle-tested at massive scale:
- Uber serves millions of concurrent rides
- DoorDash tracks hundreds of thousands of active deliveries
- Amazon Logistics coordinates global fleet operations
Key Takeaways for Developers
If you’re building a real-time tracking feature, remember:
- Choose the right protocol: WebSockets for two-way, SSE for server-to-client only
- Cache aggressively: Keep hot data in memory (Redis), not in your database
- Isolate channels: Give each trackable entity its own communication channel
- Update efficiently: Only re-render what changed on the frontend
- Optimize payload: Send only coordinates and timestamps, nothing extra
- Consider mobile constraints: Balance update frequency with battery and data usage
The Bottom Line
Live location tracking feels seamless because engineers have solved hard problems around real-time communication, caching, scalability, and efficient rendering.
The next time you watch that delivery icon move smoothly toward your address, you’ll know there’s a sophisticated distributed system working behind the scenes—pushing updates through WebSocket channels, serving data from in-memory cache, and rendering changes with surgical precision.
No page refresh required.
Jump into our new LinkedIn thread on — How Delivery Apps Show Live Location Updates Without Refreshing the Page
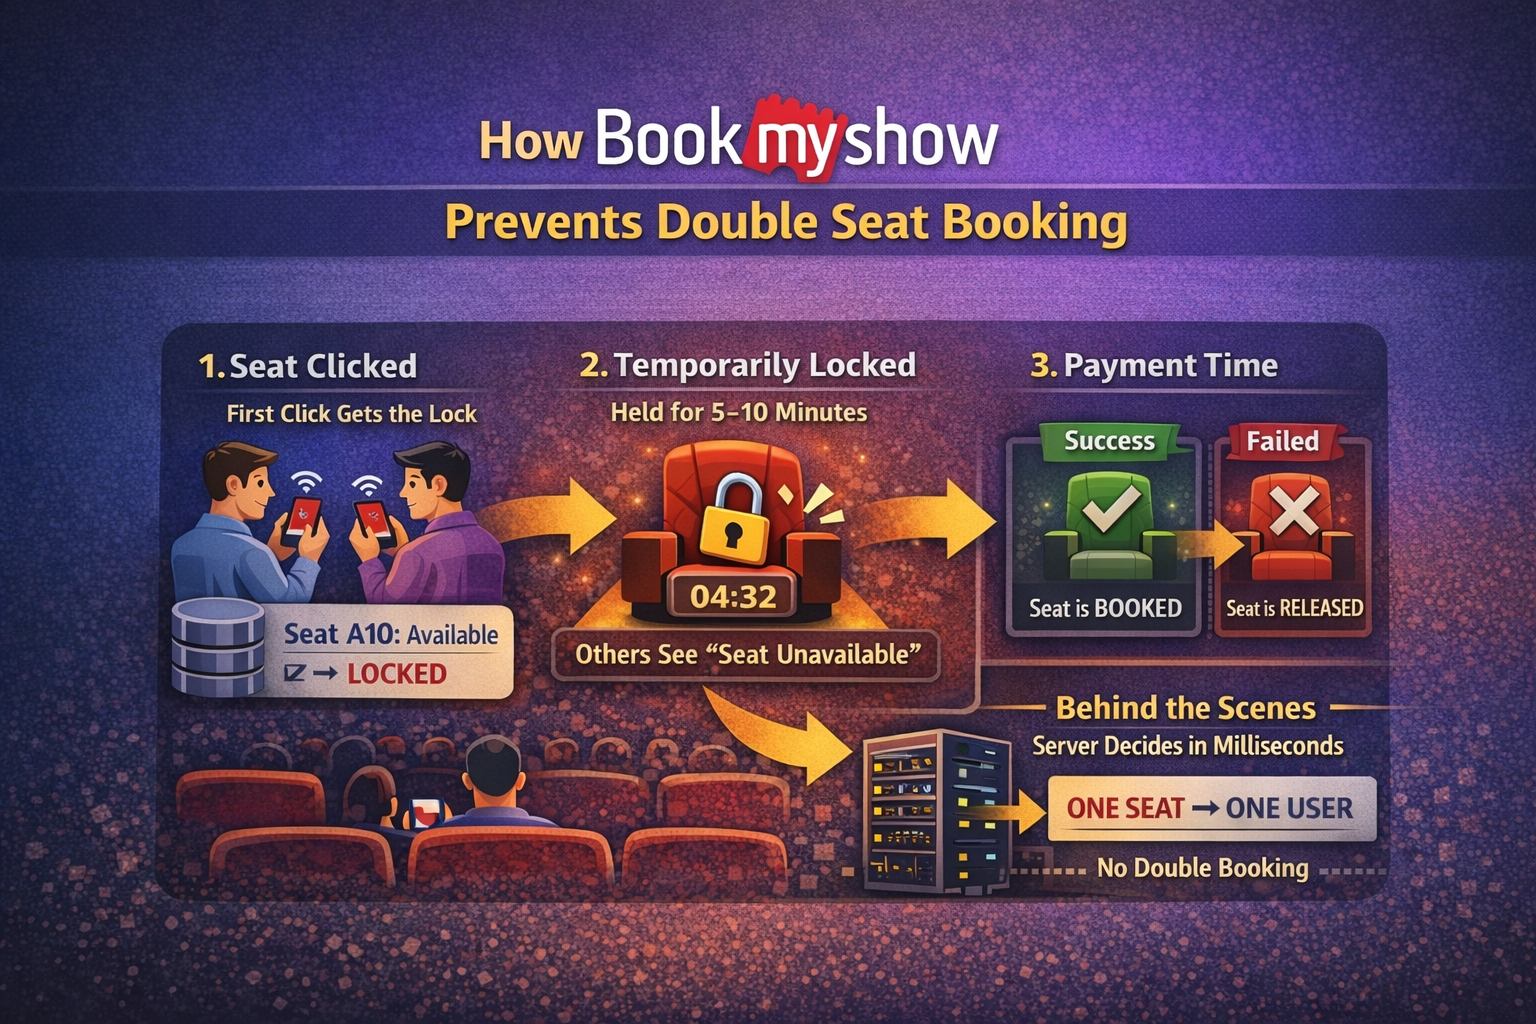
Also, read our last article: How the Seat Booking System Works at BookMyShow


Leave a Reply
You must be logged in to post a comment.